 I don't know what stirs up my fascination for making felt food. Perhaps my inner child wishes I had something this cool to play with as a kid? Whatever the reason, I have a strong desire to make fake treats with zero calories, and tons of fun! So, I'm pinning these faux edible delights day and night, in case you want to follow me and reap the benefits of my time and effort. I have seen everything from salmon to cupcakes to carrots all waiting for your crafty hands.
 For me the fake food trend started with doughnuts. They seemed easy and harmless enough. I made one and it turned out well. I put it on a plate and served it up to my daughter. She reacted with a loud laugh and instantly knocked the plate away with a swipe of her hand when she realized she'd been had. My carefully embroidered doughnut fell to the floor and instantly landed in my westie's slobbery mouth. No, Sparky, the doughnut was not meant for you. Luckily, felt can be washed.
 After staring at the one doughnut on a plate for a few days, I decided it needed friends and embarked on a dozen. I had finished sewing eight doughnuts in total, but then my college aged daughter decided to prank her roommates and confiscated one. So, now I'm back down to seven. They look super cute sitting on a plate in my kitchen, but what am I going to do with a plate full of donuts? I don't have young kids. My four girls are all in high school and college. I'm contemplating making a whole set of foods to give to each daughter for when they have kids. It is slow going with all the other sewing projects I have in the works. It could take until they have kids before I get a set done. After all, I still have to make five more doughnuts to even get to a dozen.
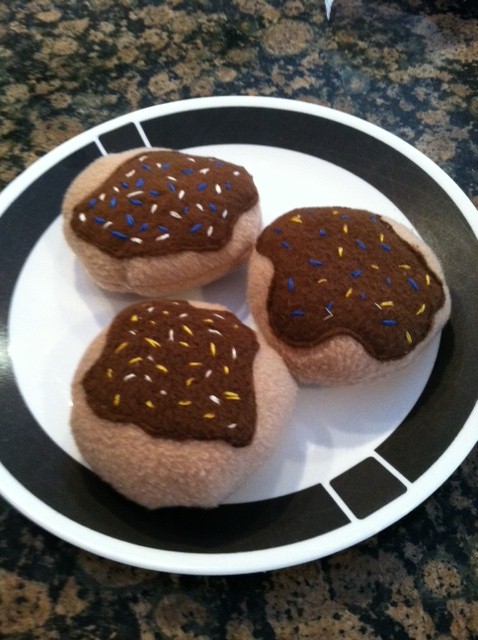
So here are some photos of my doughnuts. I did not use a pattern. I simply traced around a Tupperware lid and cut 2 circles. Then I took a smaller lid and cut 1 icing circle to fit on top for the icing color. I used my creative eye to then shape it to look like icing (weave in and out and around). I did not want all of my doughnuts to look the same so this worked for me.
When I had my parts all cut out, I selected two shades of embroidery floss that would show up well on each icing color and would work well with each other. I then used double floss to stitch little sprinkles on the icing. I have seen some doughnuts where they sew on tiny beads. These are very pretty too, but I envisioned babies playing with mine, so I skipped the beads. When all the icings had sprinkles, I sewed one icing top to one doughnut circle. Since it is felt there really isn't a right side. I then put the other doughnut circle on top and sewed with the machine all the way around, leaving a small gap for turning. flip your doughnut right side out and stuff it. I used a combination of fiberfill and leftover felt scraps to fill mine. Sew your "gap" shut by hand and you have a yummy treat. I have found you can also use fleece if you have that lying around. Enjoy!


